This project is actually super easy and only takes a few supplies and your baby will love it!
What you need:
- Paper, preferably cardstock, colored or white
- Magazines, parenting or baby magazines will have the best stuff
- Glue stick
- Contact paper (can be found at Wal-mart)
- Scissors
- Hole puncher (optional)
- Metal ring for documents (optional)
1.) Look through the magazines and clip out pictures of babies, toys, food, or numbers and letters, whatever you want the theme of the cards to be. Think colorful and appealing to look at!
2.) Next cut your paper so you know what size to trim your magazine images down to. I chose to cut my 8.5x11 size paper into 4 equal rectangles, you can do whatever size you like.
3.) Trim your magazine images and glue them onto the cards. Make sure to put them on the front and back of the cards. Also don't use too much glue as the purpose is simply to get the image stuck to the paper, not every edge has to be glued down.
 |
| Front |
 |
| Back |
4.) Take images and lay them out onto the contact paper to see how much contact paper you should cut off the roll. Then count the number of squares one row of cards takes up and cut more strips of contact paper so that you have enough contact paper cut to cover both the front and back of the cards. I found it was easier to peel one big strip of contact paper and lay all the cards on top of the sticky side, then do one row at a time covering the other side. Just be sure to cover the entire card and have some bleed over on the edges so that you can trim around the cards and get a nice seal.
5.) Once all the cards are covered in contact paper cut around them and trim the edges so they all look uniform. You can then choose to either hole punch each of them in the corner and put them on a ring, or you can leave them as is.
 |
| Trimmed cards |
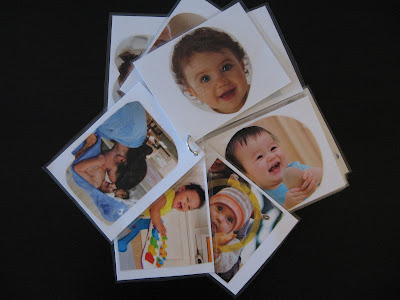
 |
| Finished cards, no hole punch |
 |
| Hole punched book |
 |
| Hole punched book |


No comments:
Post a Comment